Set up MyFoodFast POS
This guide walks you through getting MyFoodFast POS running from scratch — registering your terminal, installing the app (on the web or on an Android/Sunmi device), and connecting your printer and card reader. Follow the steps in order and you'll be taking orders in a few minutes.
Note: MyFoodFast POS needs a constant internet connection. It runs on the same central database as your Back Office, so orders, menus, and settings stay in sync in real time. A wired (Ethernet) connection is the most reliable, with Wi-Fi as a good alternative.
What you can run it on
MyFoodFast POS runs two ways:
- Web — in the Chrome browser on a Windows, Mac, Chromebook, or Android computer or tablet. The web version supports printing on these devices.
- Android app — on Android tablets (not phones), used in landscape, with a screen 8 inches or larger. This includes Sunmi POS terminals.
Note: Card readers work only with the Android app, not the web version. See Step 5.
Note: iPads are not supported for printing. You can open the web POS in Safari or Chrome on an iPad and take orders, but it cannot print receipts or kitchen tickets — Apple's iPadOS does not allow the printing helper our web POS relies on. If you need to print, use an Android/Sunmi terminal or a Windows/Mac/Chromebook device instead. An iPad can still be useful as an extra order-taking screen alongside a printing terminal.
For recommended terminals, printers, card readers, and where to buy, see Recommended hardware for MyFoodFast.
Before you start
You'll need:
- A Back Office admin login so you can create a terminal and get its PIN
- A device to run the POS on — either a computer/tablet with the Chrome browser, or an Android device (such as a Sunmi terminal)
- A stable internet connection at the store
- Any hardware you plan to use: an 80mm network thermal printer and/or a Stripe card reader (optional, can be added later)
Step 1 — Register your terminal in Back Office
Every POS device — web or Android — registers using a 6-digit PIN generated in Back Office. Do this first.
- Open Back Office and sign in.
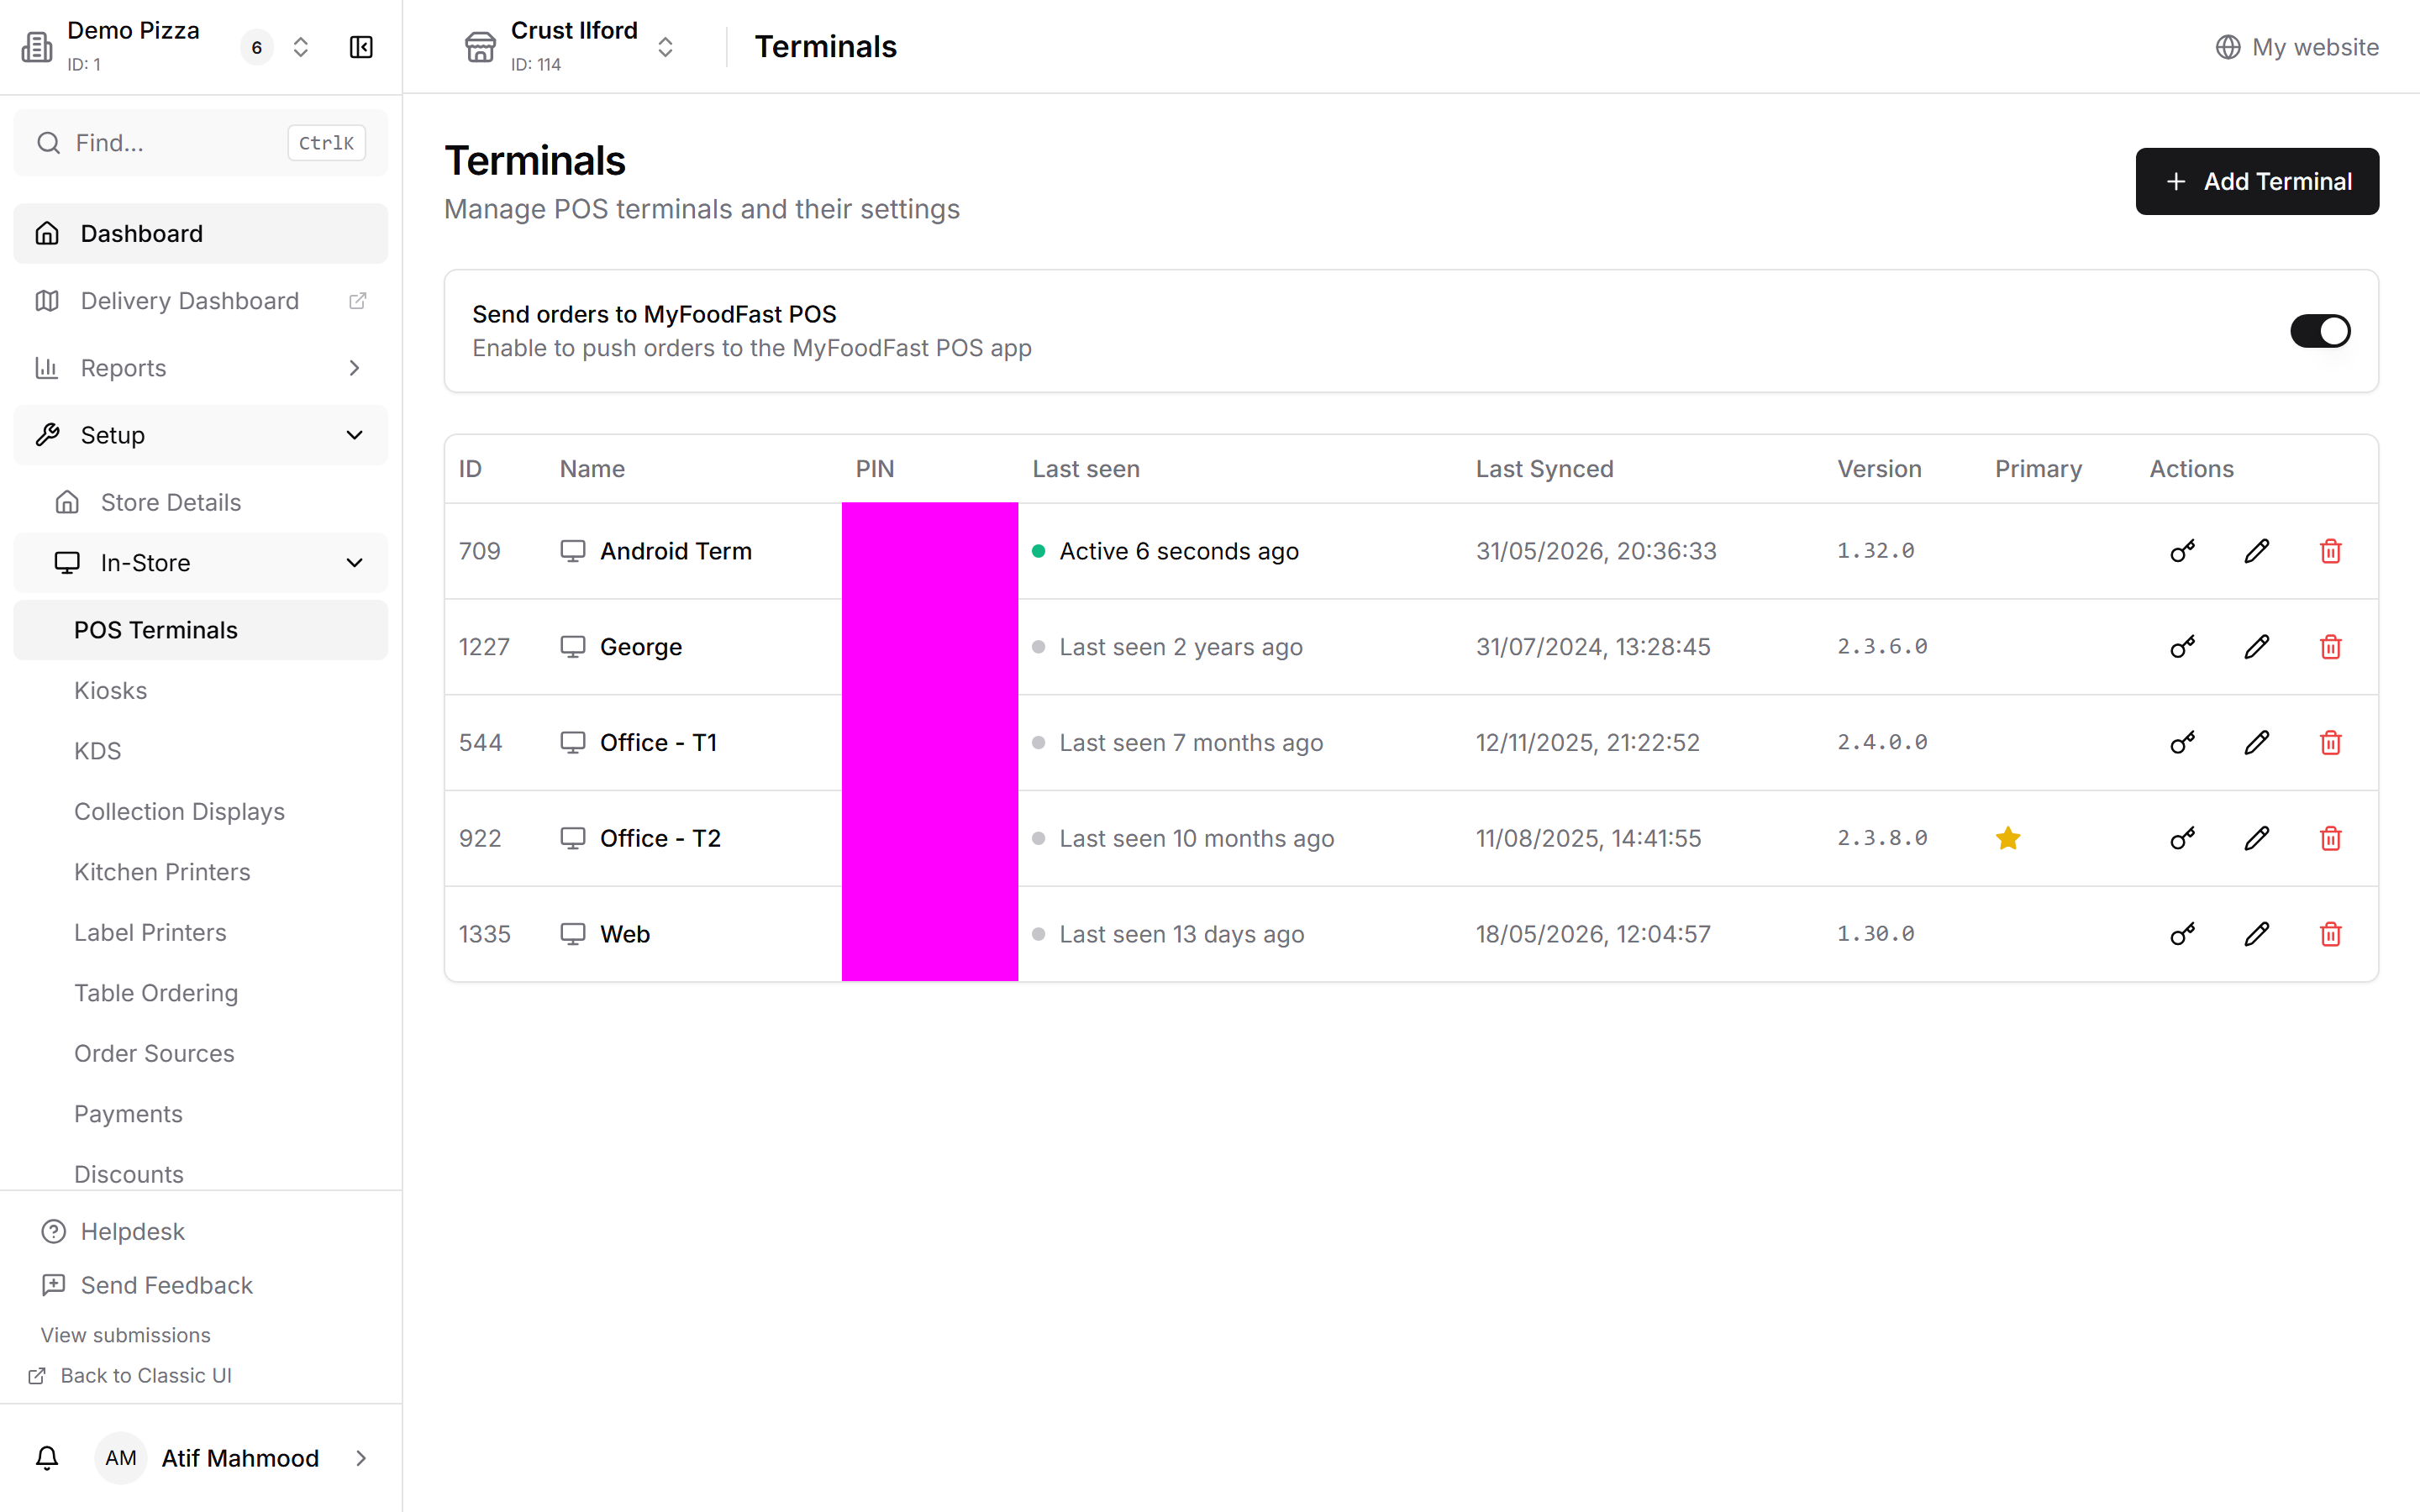
- Go to Setup > In-Store > POS Terminals.
- Make sure Send orders to MyFoodFast POS is toggled on at the top of the page — this lets Back Office push orders to the app.
- Click Add Terminal, give it a name, and save. Its 6-digit PIN appears in the PIN column.
- Use the edit (pencil) icon in the Actions column to rename a terminal or change its settings.
Tip: If you're setting up more than one terminal, add a separate terminal for each device and give them clear names like Android T1 or Web T2. This makes printers, reports, and shifts much easier to manage later.
Keep this PIN handy — you'll enter it on the device in Step 3. Once a terminal registers, its PIN is used up and the column shows ------. To issue a fresh PIN for an existing terminal, use the key icon in the Actions column.
Step 2 — Install the POS app
Choose the path that matches your device.
Option A — Web (Chrome browser)
Best for computers and tablets running Chrome.
- Open Chrome and go to https://myfoodfast-pos.web.app/.
- Wait for the POS to load.
- To keep it handy, install it as an app: click the install icon in the address bar (the small monitor-with-down-arrow icon, just to the left of the bookmark star), then click Install.
- MyFoodFast POS now opens in its own window, and you'll get a shortcut you can launch directly from then on — no need to type the address each time.
Tip: If you don't see the install icon, refresh the page once it has fully loaded. The icon appears in the right-hand side of the Chrome address bar.
Option B — Android / Sunmi device
How you install depends on the device:
- Sunmi terminal supplied by MyFoodFast — the POS app is pre-installed and set to launch automatically when the terminal powers on. There's nothing to download — skip straight to Step 3.
- Your own Sunmi device — open the Sunmi App Store on the device, search for MyFoodFast POS, and tap Install.
- Any other Android tablet (such as a Lenovo tablet) — open the Google Play Store, search for MyFoodFast POS, and tap Install.
Once installed, open the app and continue to Step 3.
Note: The app may currently appear as POS in the store listing — this is being renamed to MyFoodFast POS. It's the same app.
Note: For step-by-step help unboxing and connecting a Sunmi terminal supplied by MyFoodFast, see Set up your Sunmi terminal with MyFoodFast POS.
Step 3 — Enter your PIN to register
- Open the MyFoodFast POS app (web or Android).
- When prompted, enter the 6-digit PIN you generated in Step 1.
- The terminal registers and loads your latest menu.
The device is now linked to your store. You only need to do this once per terminal — it stays registered after that.
Step 4 — Connect a printer (optional)
MyFoodFast POS supports 80mm network thermal printers connected by Ethernet or Wi-Fi. Make sure the printer is on the same network and prints fine from another device first.
- In Back Office, go to Setup > In-Store > POS Terminals, click the edit (pencil) icon on your terminal, and enable the printers you need.
- On the POS, go to Settings > Select Printers, choose your printer's IP from the list, and tap Test.
You can set up Customer, Kitchen, and Dispatch printers depending on your needs.
Note: Bluetooth printers aren't supported. If you're attaching a cash drawer, it must be physically connected to your Customer printer.
For the full breakdown of printer types, label printers, and troubleshooting, see Set up printers.
Step 5 — Connect a card reader (optional)
MyFoodFast POS takes card payments through a Stripe card reader such as the WisePad 3.
Note: Card readers are supported on Android devices only — the web version cannot connect to a card reader.
The short version:
- In Back Office, connect your Stripe location under Setup > Add Ons > Stripe, then enable Stripe under POS > Payments.
- Power on the reader and turn on Bluetooth on your Android device.
- In the POS app, tap the terminal icon (with the red dot) next to the Settings icon to pair. The dot turns green once connected.
For the complete walkthrough, see Set up your WisePad 3 card reader with MyFoodFast POS.
Step 6 — Test your setup
Confirm everything works before your first real order:
- Check that your menu has loaded on the POS.
- Place a small test order and confirm it appears on the Track screen.
- If you set up a printer, confirm the test receipt prints.
- If you set up a card reader, run a test transaction to confirm the reader responds.
That's it — your terminal is ready to take orders. Repeat Steps 1–3 for each additional device.
Next: before you start serving, open your shift so sales and cash are tracked correctly.
Troubleshooting
"Invalid PIN" or the PIN won't register Each PIN registers one device and is used up once a terminal connects. Generate a fresh PIN with the key icon next to the terminal in Back Office (Setup > In-Store > POS Terminals), then enter it carefully — it's six digits with no spaces.
Orders aren't reaching the POS Check that Send orders to MyFoodFast POS is toggled on at the top of the Terminals page. In the same list, confirm the terminal shows as Active with a recent Last Synced time — if it's not, the device has lost its internet connection.
The web app is blank or won't load The web POS always loads the latest version on refresh, so reload the page (or close and reopen the app window). Make sure you're using Chrome and the device is online.
The menu is missing or out of date The POS caches your menu locally for fast loading and doesn't refresh on its own. After changing items or prices in Back Office, open Settings > Menu on the POS and tap Refresh Menu to pull the latest version.
Tip: Still stuck? Note your terminal's name and the Version shown in the Terminals list before contacting support — it helps us pinpoint the issue faster.